As an Amazon Associate, we earn from qualifying purchases. Some links on this site are affiliate links at no extra cost to you. Our recommendations are based on thorough research and editorial judgment.

Using Flash Gels: Fixing Mixed Light and Creating Mood
Using flash gels helps us fix mixed lighting and create specific moods in our photos. We can match our flash color temperature to ambient light using gels like the ½ CTO to blend indoor tungsten lighting. For creative effects, colored gels work well, allowing us to evoke emotions by combining colors like teal and pink. These adjustments enhance our images by correcting color mismatches and setting the right atmosphere. Let’s explore various gel types and their applications further.
Key Takeaways
- Use color correction gels, like ½ CTO, to match flash with ambient light and reduce unwanted color casts.
- Experiment with colored gels to set the desired mood, utilizing combinations like teal and pink for emotional depth.
- Assess the ambient light’s color temperature to choose the appropriate gels for consistent and balanced images.
- Position gelled lights strategically to enhance saturation and vibrancy in your photographs.
- High-quality lighting with a good CRI improves color representation, ensuring effective gel interaction with light sources.
Understanding Lighting Gels and Their Purpose

When it comes to photography, lighting gels play a fascinating role in shaping the look of our images. These colorful, translucent sheets are like magic filters for our lights, allowing us to change the color and mood of a scene. For example, if you want to capture a natural look in your portrait, using color correction gels can help balance the light and make your subject’s skin tones appear true to life.
On the flip side, if you’re going for a more creative vibe, non-corrective color-effect gels can help set the emotional tone. Think about using a warm orange gel for a cozy, sunset feel, or perhaps a cool blue gel to create a calm, tranquil atmosphere. Understanding how complementary colors work together can elevate your portraits, making them more visually appealing. Additionally, pairing gels with cameras that offer advanced autofocus performance can ensure your subject remains sharply focused even under creative lighting conditions.
The Impact of Ambient Light on Portraits

Hey there! You know, ambient light is super important when it comes to taking great portraits. It sets the whole mood and can really influence the colors you see in your photos. Before we start snapping away, it’s a good idea to take a moment to check out the ambient light around you. For example, if you’re shooting during golden hour, that warm glow can add a beautiful touch to your images.
Once you have a sense of the lighting, setting your camera to daylight white balance is a smart move. This way, you can actually see the true colors of the scene. If the colors seem a bit flat, try underexposing the shot by about 2 ½ stops. Doing this can really help bring out the richness of the ambient colors, giving you a stunning backdrop for your portraits.
Now, if you want to mix in some flash with that ambient light, you might run into some issues with color mismatches. That’s where gel filters come into play—using something like a ½ CTO filter can help bridge the gap between the different light sources. This way, you keep a nice balance and ensure your portraits feel cohesive and vibrant, while still harnessing the lovely atmosphere of the ambient light around you. That’s a great way to enhance your photography game! Using 5-in-1 reflectors can further help manipulate this mixed lighting by reflecting and diffusing light for optimal portrait effects.
Matching Flash to Ambient Light Color Temperature

When it comes to photography, one of the keys to capturing stunning images is matching the color temperature of your flash to that of the ambient light. Imagine you’re shooting in a warm, cozy room lit by tungsten bulbs; to get that perfect balance, you can use a flash gel. For example, if you pop a ½ CTO gel onto your flash, it shifts your flash’s color temperature to about 3200K. This small adjustment helps blend the flash light with the warm ambient light, preventing any awkward color clashes between your subject and the background.
To figure out what color gels to use, start by checking the ambient light’s color and setting your camera to a daylight white balance. It’s pretty straightforward! If you notice that your images look too cool or too warm, you’ll know exactly what gel to reach for next. Properly balancing your flash and ambient light can really amp up the richness of your photos, making them feel more cohesive and visually pleasing. So, let’s explore more about how different lighting conditions can further transform your photography!
Using accessories like a Joby GorillaPod Flexible Tripod can also help position your flash precisely for optimal lighting effects.
Techniques for Correcting Mixed Lighting With Gels
When you’re working with mixed lighting, using gels can really make a difference. First, let’s talk about understanding the various light sources in your scene because they can create odd color casts. For example, if you have warm tungsten lights alongside a flash, slapping a ½ CTO gel over your flash can neutralize those yellowy tones. This simple trick helps balance out the overall color temperature, making everything look more natural.
Now, when it comes to your ambient light, one effective strategy is to underexpose your shot by about 2 ½ stops. This technique doesn’t just add a bit of drama; it also enhances the vibrancy of those ambient colors, making them pop in a visually pleasing way. If your scene has both tungsten and daylight, you might consider using CTB gels to cool down the tones. The idea is to match the color of the gel on your flash to the dominant ambient light; that way, the entire scene blends nicely together. Using external microphones with a supercardioid pattern can help capture clear audio even in challenging lighting environments.
Creative Mood Setting With Colored Gels
Hey there! Have you ever thought about how colored gels can totally change the mood in your photographs? They’re surprisingly powerful tools that can bring a unique flair to your images. For instance, if you combine teal and pink gels, you create a striking contrast that grabs attention and adds a layer of emotional depth to your portraits.
Using colored gels can also help keep colors consistent, especially when you’re dealing with mixed lighting. Imagine setting up a teal light as your main source and then using a pink fill light to subtly illuminate the shadows. This approach adds dimension to your subjects and really makes them pop in your photos.
The best part is experimenting with different combinations of gels! You can take a simple shot and turn it into something really eye-catching. It’s all about playing around and seeing what resonates with your creative vision. So, ready to start experimenting with some gels? Let’s explore how to position your lights effectively!
For optimal results, consider using a flash with a round head design to provide soft, even illumination that complements colored gels.
Tools and Equipment for Using Flash Gels
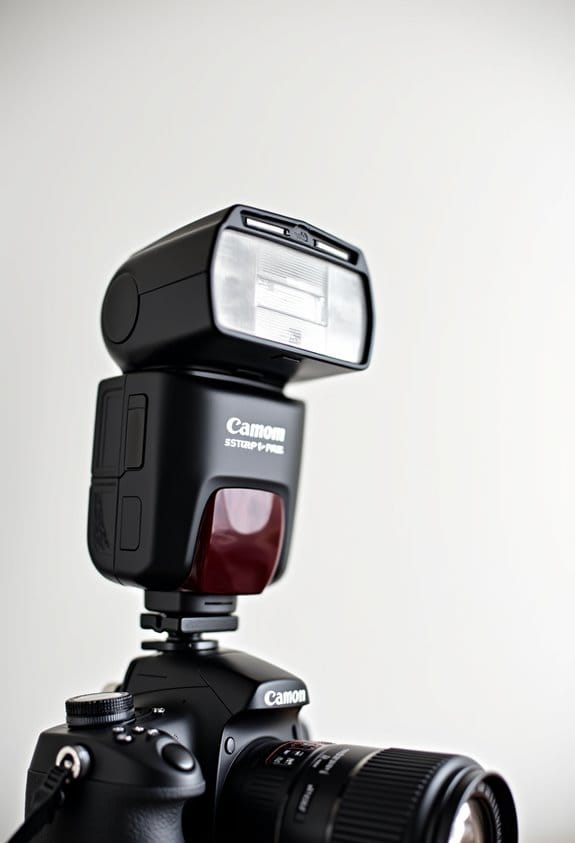
Hey there! So, when you start playing around with flash gels to add some fun colors and moods to your shots, you quickly realize that having the right tools and equipment can really enhance your results. Flash gels can completely transform the light in your setup; think of it like giving your images a colorful filter straight from the source! Using magnetic modifiers, like the ones from MagMod, makes it super easy to switch up the color or adjust the intensity on the fly. It’s perfect for those moments when inspiration strikes and you need to change things up quickly.
Now, if you want to nail the color accuracy in your shots, color-correction gels are a must-have. They help maintain proper white balance, especially if you’re mixing different light sources. On the other hand, non-correction gels can add a nice artistic twist to your images. Also, barn doors are really handy for keeping those gels securely in place and reducing any unwanted light spill. This way, you can keep the color vibrant and true. And trust me, investing in durable, heat-resistant gels is key, especially if you’re working with powerful strobes—they can get pretty hot!
As you’re getting comfortable with all this, think about how these tools can shape your creative vision. It’s exciting to see how the slightest change in light can impact the mood of a photograph! To further enhance your setup, consider using video lights with high CRI ratings which ensure accurate color representation when mixing gels with other lighting sources.
Popular Types of Lighting Gels and Their Effects
Hey there! So, let’s chat about lighting gels and how they can totally change the game in photography. Lighting gels are these cool colored filters that you place in front of your lights, and they come in all sorts of variations to create different effects. For example, if you want to mimic the soft glow of moonlight, a blue gel is your best friend—it gives a nice cool hue that works wonders for night scenes.
Now, if you’re looking for something to enhance skin tones or backgrounds, Rosco Filters has a fantastic array of vibrant colors. And if you’re dealing with tricky lighting conditions, Flashpoint Filters can help you balance colors whether you’re shooting indoors or outdoors. It’s all about making those little adjustments to get the look you want. Oh, and by the way, most gels are made from materials like polycarbonate or polyester, which can handle the heat from strobes without melting.
Using these gels can really help you manipulate your light and get those professional results you dream of. So, whether you’re refining your skills or just starting out, these lighting gels are definitely worth experimenting with! Speaking of experimenting, let’s talk about how to set up your lighting for maximum effect. Additionally, combining gels with graduated color filters can add more depth and creative control over your lighting setup.
Exploring Color Combinations for Enhanced Imagery
Hey there! Let’s chat about color combinations in photography. You know those moments when you see a photo that just grabs your attention? A big part of that magic comes from how different gels interact to create those striking colors. Take complementary colors like teal and pink, for instance. They make each other stand out, creating this exciting contrast that can really add depth to your images.
Now, if you position your lights closer to your subjects, you’ll notice the colors become more vibrant and saturated, making your portraits really pop! It’s a simple trick, but it makes a huge difference. And remember color theory—it’s like a roadmap for crafting eye-catching images. If you mix harmonious colors, the viewer feels at ease, while clashing colors can pull focus away from what you actually want them to see.
Let’s say you use a warm orange gel; it can give your photo this cozy, inviting vibe. On the other hand, a cool blue gel might bring a calm or even melancholic feel to the scene. So, experimenting with these gels and lighting can lead you to some really unique artistic effects. Speaking of effects, let’s look at how lighting angles can change everything. When working in video production or photography, consider incorporating a shotgun microphone if you need precise audio capture alongside your visual effects.
Practical Applications of Gels in Photography
When we talk about the practical applications of gels in photography, it’s fascinating to see how versatile they are for both color correction and creative effects. Flash gels can totally change the mood of your shots, especially when you’re trying to match the light from your flash with ambient lighting. For example, if you’re shooting indoors with warm tungsten lights, a ½ CTO gel can help your flash light blend in perfectly, so everything looks harmonious.
In product photography, gels can really make your images pop. Want to create a cool blue tone for that sleek gadget you’re photographing? Just use a blue gel to cast that color and watch how it transforms the whole scene. And if you’re working on portraits, consider letting some pink light spill onto your background; it adds a fun, vibrant touch without overpowering your subject.
The key is placement—where you put those gels matters a lot. When done right, they keep the colors nice and saturated, making your photos look rich and engaging. These techniques can elevate your photography game significantly! Ready to explore more about lighting techniques? Let’s dive into how you can use different light sources to create stunning effects. Using a flash with a stable color temperature range from 5500K to 6500K helps ensure consistent color reproduction when combining gels with ambient light.
Expanding Creativity Through Experimentation With Gels
Hey there! If you want to ramp up your photography vibe, experimenting with gels is a fantastic idea. Gels can totally manipulate colors and shift the entire mood of your shots. For instance, if you choose a vibrant orange gel, your images can radiate warmth, making those sunset portraits pop!
When you layer gels, like combining teal and pink, you create a rich visual experience that draws the eye. It’s like giving your photos a multi-dimensional feel. Just think of how cool it looks when you turn up the light on your subject—suddenly, their features become more pronounced against that colorful backdrop.
You might also consider using multiple lights with different gels to add some richness to your background without distracting from the main subject. For example, if you use a soft blue background with a warm yellow light on your subject, it creates an inviting contrast. Overall, playing around with gels opens the door for creative expression, and who knows what unique style you might discover in the process? So, let’s chat about practical ways to apply these techniques on your next shoot! Using ring lights with adjustable brightness can help fine-tune the effect of your gels for the perfect lighting balance.
Frequently Asked Questions
Can You Use Flash and Continuous Light Together?
Yes, we can definitely use flash and continuous light together. By balancing color temperature and adjusting exposure settings, we achieve soft light and dynamic range, effectively managing flash contrast while mixing sources for creative results.
What Is the 3 Lighting Rule?
Ever wondered how to create striking images? The 3 Lighting Rule uses three light sources: key, fill, and backlight, mastering high key, low key, soft light, and hard light while balancing color temperature for stunning effects.
What Are Flash Gels Used For?
Flash gels help us modify color temperature in artificial lighting for creative photography. They enhance scenes through various gel applications, allowing diverse flash gel types to bring depth and vibrancy into our images.
How Does Lighting Affect the Mood and Tone of a Photograph?
Oh sure, just throw some lights around and hope for the best! But really, lighting conditions shape emotional responses; color psychology, contrasting shadows, and intentional darkness define our scene composition, transforming natural light into a mood masterpiece.