As an Amazon Associate, we earn from qualifying purchases. Some links on this site are affiliate links at no extra cost to you. Our recommendations are based on thorough research and editorial judgment.
Bounce Flash Indoors: How to Get Soft Light With One Speedlight
To get soft light indoors with one speedlight, we should use the bounce flash technique. By directing the flash toward light-colored walls or ceilings, we can reflect and soften the light, reducing harsh shadows. Staying 1 to 2 meters from the bounce surface helps maintain good exposure. It’s also important to reflect on the direction of the light, as this can affect the mood of our photos. If we keep exploring, we will discover more tips for mastering bounce flash.
Key Takeaways
- Utilize light-colored walls or ceilings for bouncing flash to achieve softer light and reduce harsh shadows in indoor photography.
- Maintain a flash distance of 1 to 2 meters from the bounce surface for optimal light output and exposure.
- Adjust flash angle to control shadow placement and enhance depth, ensuring flattering lighting on your subjects.
- Consider using a bounce adapter or mini softbox for enhancing light diffusion, especially in close-up shots.
- Experiment with ISO and aperture settings to compensate for potential underexposure when bounce surfaces absorb light.
Understanding Bounce Flash

Hey there! Have you ever tried indoor photography and felt like something was off with your photos? Understanding bounce flash can really transform how your shots turn out. Instead of blasting a bright light directly onto your subject, which can create harsh shadows, bounce flash photography uses nearby surfaces to soften that light.
For example, if you’ve got a white wall nearby, bouncing your flash off it can fill your scene with gentle, even lighting. So, instead of that stark flash look, you get a more flattering, natural feel. Just keep in mind, light-colored walls are your best friends for this technique since they reflect light well, while darker colors tend to soak it up.
Ideally, aim to keep your flash about 1 to 2 meters away from the surface you’re bouncing off. This distance helps diffuse the light more effectively. So next time you’re capturing a moment indoors, remember to look around for surfaces that can help enhance your images, making them warm and inviting. This small tweak can really boost the quality of your photos!
Additionally, using a flash with a high Guide Number can provide the necessary brightness, even when bouncing light indoors.
Let’s explore more ways to elevate your indoor photography skills.
Importance of Light Direction
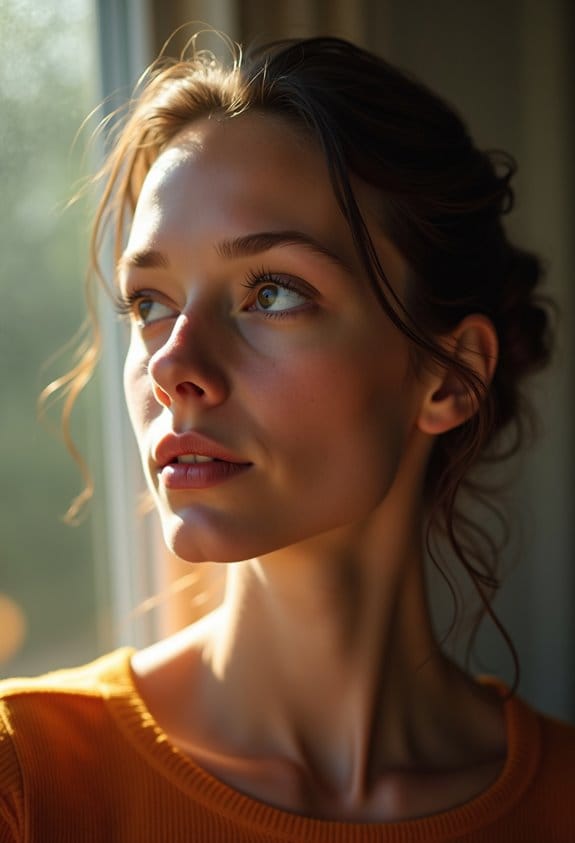
Hey there! Let’s chat about something really important for indoor photography: light direction. You might not realize it, but the way light hits your subject can totally change the mood and depth of your photos. For instance, when you use bounce flash—where you direct the flash to hit a wall or ceiling instead of your subject—you can create this beautiful soft light. This technique helps minimize those harsh shadows that can sometimes make our photos look unappealing.
Imagine you’re shooting at a friend’s house with white walls. If you bounce your flash off those walls, the light spreads evenly, giving your subject a nice, flattering glow. But if the walls are painted a vibrant color, like red or blue, they can cast those hues onto your subject, which might not be the effect you want. So, it’s good to think about where you’re bouncing your flash based on the position of your subject. This way, you ensure the light is coming from the most flattering angle, adding versatility to your shots and helping you achieve the overall look you desire.
Next up, let’s explore how different types of light sources can complement your indoor photography for even more creative possibilities! Remember that using adjustable lengths can also help control the placement and angle of your lighting setup effectively.
Enhancing Light Quality

If you want to enhance light quality in your indoor photography, let’s talk about how to make the most of your flash. One trick is to bounce the flash off the walls or ceiling. This spreads the light around and creates a softer look that really flatters your subjects. Just remember to use white or light-colored surfaces, as they reflect light much better than darker colors.
Try keeping your bounce surface between 1 to 2 meters away from your flash. This distance helps give you even lighting and prevents any parts of your photo from ending up too dark. If you want to take it a step further, consider using a bounce adapter on your flash. It can help disperse the light even more, which is especially great for portraits as it smooths out skin tones.
Also, adjusting the angle of your flash so it points toward the ceiling or walls can work wonders. It helps you steer clear of those harsh shadows that can flatten your subjects, giving your images more depth. Once you start playing around with these techniques, you’ll discover just how much of a difference they can make in your photos! Now, let’s explore some more advanced lighting techniques that can really add a professional touch to your shots.
Using a camera with optical image stabilization can further minimize blur and improve image clarity when working with indoor lighting.
Overcoming Power Limitations
Flash power limitations can really throw a wrench in your indoor photography, especially when you’re relying on bounce flash techniques. When you bounce the flash off surfaces like walls or ceilings, the light can end up being way less intense than you hoped, which might leave your images looking underexposed or flat. To help with this, you can crank up your ISO or open up the aperture a bit, which lets more light hit your camera sensor.
It’s also good to think about how far away your bounce surface is. If it’s more than about 2 meters away, your bounce light loses a lot of its kick. For the best results, try to aim for white or brightly colored walls—they reflect light so much better. And don’t forget to experiment with your settings while you’re shooting! Frequent adjustments can help you snag those well-lit photos you’re aiming for. This way, you’re setting yourself up for success in every shot you take!
Speaking of settings, let’s chat about how to choose the right ISO and aperture together for an optimal shot. Many modern mirrorless cameras feature advanced autofocus systems that can assist you in keeping your subject sharp even in lower light conditions indoors.
Strategies for Challenging Environments
So, indoor photography can be a bit tricky when you don’t have good bounce surfaces, right? One of the best tricks I’ve learned is to scout around for white or lightly colored walls and ceilings. They act like a reflector, bouncing light back onto your subject and helping to minimize those harsh shadows that can mess things up. Just remember to keep your distance; about 1 to 2 meters is ideal. If you go further away, the light’s not going to be as effective and you might end up with underexposed shots.
Another handy tip is to experiment with different angles of your flash head. This can really change how the light spreads. And while you’re at it, don’t forget to tweak your ISO and aperture settings based on what you’re working with. For instance, if you’re shooting in a small room with a low ceiling, angling your flash towards the wall can give you some great results. Using a bounce adapter can also be a real lifesaver—this helps diffuse the light for a softer look, which is perfect for close-up shots of people or objects.
Lastly, be mindful of the colors of your bounce surfaces. Dark colors can soak up light, which isn’t ideal when you’re trying to get those bright tones in your photos. Keeping these tips in mind will definitely help you make the most of the space you’re in. Additionally, using a monitor with waveform monitoring can enhance your ability to evaluate light and exposure accurately during your shoot.
Now, let’s chat about lens choices for indoor environments!
Essential Techniques for Bounce Flash
Hey there! Let’s chat about bounce flash and why mastering some crucial techniques can really elevate your indoor photography. When you bounce flash off walls or ceilings, you get this beautiful soft light that makes portraits look a lot more flattering. It helps to reduce those pesky harsh shadows, which is always a win.
Now, think about the direction of your light. When you bounce it off a wall, it adds depth and dimension to your subject, making them stand out. But if you bounce it off the ceiling, you might end up flattening their features, which isn’t ideal. A good rule of thumb is to keep your Speedlite about 1 to 2 meters away from whatever surface you’re bouncing it off. This distance helps maintain the right light output, so your photos don’t come out underexposed. If you’re shooting close-ups, consider using a bounce adapter—it can make the light even softer.
Another fun trick is to incorporate a catchlight panel in your flash head. This little detail can add a nice sparkle to your subject’s eyes, especially when you angle the flash just right. And don’t forget to adjust your shutter speed and depth of field to complement all this! Also, pairing bounce flash with in-body stabilization can help capture sharper images when shooting handheld indoors.
Equipment Recommendations for Effective Bouncing
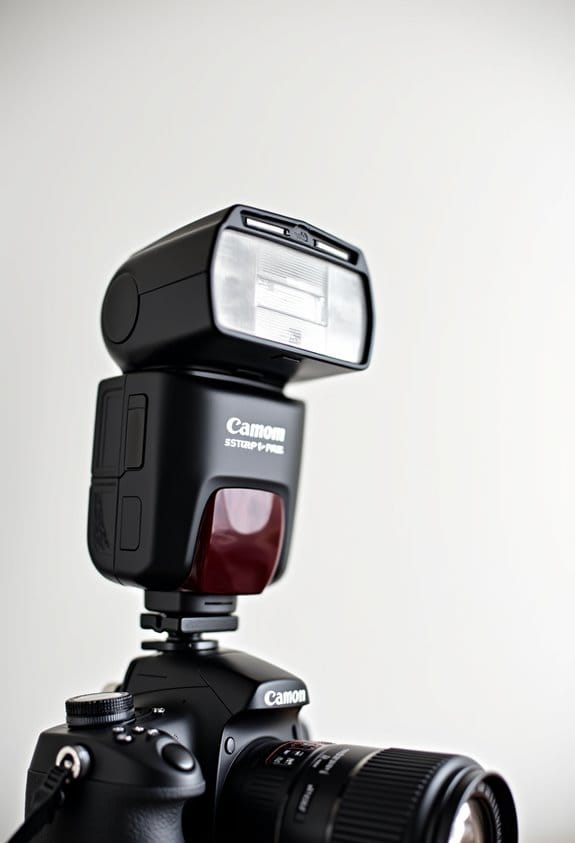
If you want to level up your bounce flash technique, picking the right equipment is key! I highly recommend the Speedlite 600EX II-RT because its flash head tilts in all sorts of directions, making it easier to create that lovely soft light. It’s like having a built-in assistant for your photography!
Now, if you really want to simplify your life, check out the Speedlite 470EX-AI. This one’s clever; it uses AI to automatically figure out the best bounce angle depending on where you are. Imagine not having to guess where to aim the flash—super helpful when you’re snapping photos at a crowded event!
Don’t forget about using a bounce adapter with compatible Speedlite models, like the 600EX II-RT and 430EX III-RT. This handy tool can soften the light even more, reducing those harsh shadows and making your portraits look way more flattering. Oh, and if you’re shooting close-ups, a mini softbox diffuser can really enhance the light quality, giving your images that professional touch.
A good rule of thumb is to keep your distance from the surface you’re bouncing off to about 1 or 2 meters to get the best results. So, whether you’re capturing a joyful moment at a party or working on a portrait session, these tips will make your bounce flash technique shine. Let’s move on to some practical setups that can help you get even more creative with your lighting!
For added convenience, flashes like the Canon Speedlite EL-10 offer flexible modes allowing seamless switching between E-TTL and manual flash settings to better control your lighting environment.
Mastering Shadow Management
Mastering shadow management is a key skill if you want to add some real depth and character to your photos. Instead of just bouncing your flash off the ceiling, consider using wall bounce techniques. When you bounce off the ceiling, the shadows tend to fall directly underneath your subject, which can make your images look a bit flat. By positioning your flash head at a 90-degree angle to a wall, you can make the shadows more dynamic and interesting—a little trick that can breathe life into your portraits.
Also, don’t forget that the color of the wall makes a big difference too! For instance, if you bounce your flash off a white wall, it reflects light beautifully, while a dark wall might actually absorb some of that light. To get the softest illumination, keep the flash about 1 to 2 meters away from the wall. And if you want to go the extra mile, using a bounce adapter can really help diffuse the light more effectively, softening those harsh shadows. For those shooting bird photography, employing cameras with Image Stabilization can further enhance image clarity by reducing blur from hand movements.
Frequently Asked Questions
How to Get Soft Light With Flash?
To capture soft light, we can explore creative flash usage and effective lighting setups. By mastering soft light techniques and leveraging indoor photography tips with ambient light integration, we’ll elevate our images to new heights.
How to Soften a Speedlight?
To soften a Speedlight, we can use flash diffusion methods like mini softboxes, bounce light effectively off walls, and apply speedlight modifiers. These indoor lighting tips help us achieve wonderfully soft light for our subjects.
How to Use Speedlight Flash Indoors?
For indoor photography, we can use flash techniques by bouncing our Speedlight off white surfaces. This creates soft lighting setups, ideal for low light. Let’s remember these portrait tips for beautifully lit images!
How to Turn Hard Light Into Soft Light?
To turn hard light into soft light, we can use diffused lighting techniques like bounce flash strategies, employ reflector options, and experiment with creative light manipulation for atmospheric lighting effects that enhance our images beautifully.


