As an Amazon Associate, we earn from qualifying purchases. Some links on this site are affiliate links at no extra cost to you. Our recommendations are based on thorough research and editorial judgment.

Food Photography With Window Light: Easy Tricks That Work
Using natural window light is a simple yet effective way to enhance food photography. We should aim for north-facing windows, as they provide soft, even light throughout the day. Timing is important; shooting during the golden hour, right after sunrise or before sunset, creates warm, inviting images. Using reflectors helps fill in shadows, while diffusers can soften harsh sunlight. With these easy tricks, we can greatly improve our food images. There’s more to explore on this topic.
Key Takeaways
- Shoot during golden hours for soft, warm light that enhances food colors and textures in your photographs.
- Utilize north-facing windows to capture consistent, diffused light throughout the day for balanced exposure.
- Employ diffusers like sheer curtains to soften harsh sunlight and create a flattering glow on your food.
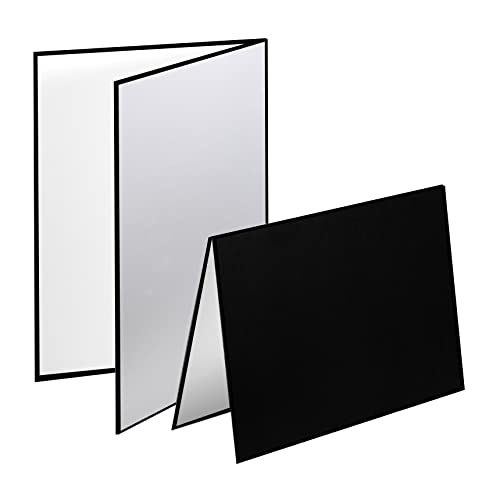
- Use reflectors, such as white foam boards, to fill in shadows and highlight intricate details of your dish.
- Experiment with different angles, such as top-down or side views, to create visual interest and depth in your compositions.
Understanding Natural Light for Food Photography

Hey there! Let’s chat about how important natural light is for food photography. Honestly, it can make all the difference in how your dishes look in photos. Just think about it—when you use natural light, it really brings out the vibrant colors and textures of the food, making everything look so much more appetizing.
So, when’s the best time to snap those food pics? Early in the morning or late in the afternoon, especially during what we call the golden hour. The light during these times is soft and warm, giving your food that irresistible touch. For example, if you’re photographing a breakfast bowl, catching that first light can make the fruits pop and the yogurt look creamy and inviting.
Also, shooting near a north-facing window is a great trick! This position provides consistent, diffused light that cuts down on those harsh shadows that can ruin a shot. And when it’s cloudy outside? That’s actually a plus! The overcast sky works like a natural softbox, lighting your food evenly and minimizing those pesky strong shadows. Have you ever tried using sidelight? It’s a cool technique where you position your light to the side of the subject, adding depth and dimension to your images.
Mastering these simple elements can really take your food photography to the next level. Using a camera with 5-axis dual image stabilization can further help ensure crisp, shake-free shots when working with natural light. Ready to experiment with these tips? Let’s move on to some fun styling ideas that can further enhance your food photography adventures!
Essential Equipment for Window Light Setup

Hey there! So, if you’re into food photography and want to harness the beauty of window light, I’ve got some tips for you. Using a north-facing window is fantastic because it provides this lovely, soft, and even light throughout the day. You know how bright sunlight can sometimes be harsh? Well, that’s where diffusers come in handy! For instance, the Neewer 40 x 60 diffuser does a great job of softening those intense rays, giving your food a flattering glow.
Now, let’s talk about reflectors, which are super helpful for bouncing light back onto your dishes. You can easily use white foam boards or even metallic surfaces. They’re perfect for filling in shadows and highlighting the details in your food. Imagine placing a white foam board just out of frame; it can bring a whole new dimension to your shot!
And if you’re looking for a bit more control, consider adding a small LED panel to your setup. It’s portable and gives you the flexibility to adjust lighting as needed. Keep in mind, it’s always a good idea to check the light at different times of the day to see how it changes. Each moment can create a different mood for your shots! Using a camera microphone can also help you capture the ambient sounds of your setup if you’re recording video alongside photography.
So, now that you’re equipped with these tips, let’s explore some creative angles for your food photography.
Recommended Products

【5 In 1 Photography Reflectors】 This 5 in 1 light reflector kit consists of a round and translucent diffuser panel and a reversible sleeve that features white, black, gold, and silver surfaces. In total, this kit will give you 5 colors of reflective surfaces to achieve different tones and effects for efficient photography, suitable for both studio & outdoor use

3 Color in One Light Reflector: White, black and silver surface, both front and back can be used. Great to fill in, reflect, diffuse, block or soften light, especially reduce shadows or emphasis on contours. Fit to different needs of reflector photography
Techniques for Manipulating Light and Shadows

If you want to manipulate light and shadows in food photography, it’s all about positioning your subjects just right. For instance, try placing your dishes near a north-facing window; this gives you soft, indirect natural light that’s perfect for capturing appetizing shots. This type of light minimizes harsh shadows, making your food look more appealing.
To create even softer lighting, consider using a diffuser—something like sheer white curtains or simple paper can do wonders. It helps to spread the light evenly. If you want to fill in those shadows for a more balanced look, grab a reflector! You can easily make one using white foam core or even aluminum foil. Try angling this reflector to bounce light back onto your dish, and watch how it brings out the colors.
When transporting your gear for outdoor food shoots, using a camera bag with weather-resistant materials can help protect your equipment from unexpected conditions.
Recommended Products

【5-in-1 Light Reflectors for Photography】Achieve professional lighting control with our versatile 5-in-1 photography reflector (90x120 cm/35x47 in), which has 4 reflective surfaces (white, gold, silver, black) and a translucent diffuser. Silver reflector delivers bright, high-contrast lighting. Gold reflector creates a warm, golden-toned glow. White reflector produces soft, even diffusion. Black reflector absorbs light to deepen shadows. Translucent reflector scatters light and softens shadows.

5-in-1 Collapsible Multi-Disc Reflector - Add quality to your subject. The light reflector kit contains one translucent panel, 4 reflectors (black, white, gold, silver) in one piece (2 dual-sided reflectors sewn together with a zipper around them).
Timing Your Shoot: Best Hours for Lighting
Hey there! If you’ve ever tried food photography, you know that timing is everything. The quality of light can make or break your shots. Ideally, you want to aim for those magical golden hours—right after sunrise and just before sunset. During these times, the sunlight is soft and warm, which really makes your food look irresistible.
Now, shooting during midday isn’t the best choice. The harsh overhead light creates strong shadows that can totally ruin a shot. For instance, take a beautiful bowl of pasta—you want the textures and colors to pop, not get lost in the shadows! Plus, if you shoot early in the morning, the light has a cooler tone, while that late afternoon glow? It’s golden and inviting.
Planning your shoot around weather and the direction of your window can really help maintain consistent lighting. So, if it’s cloudy, remember that diffused light can work wonders! Just don’t hesitate to experiment with different times; playing around can help you capture that perfect mood for your food photography. Speaking of mood, let’s chat about how you can style your dishes to complement that lovely light!
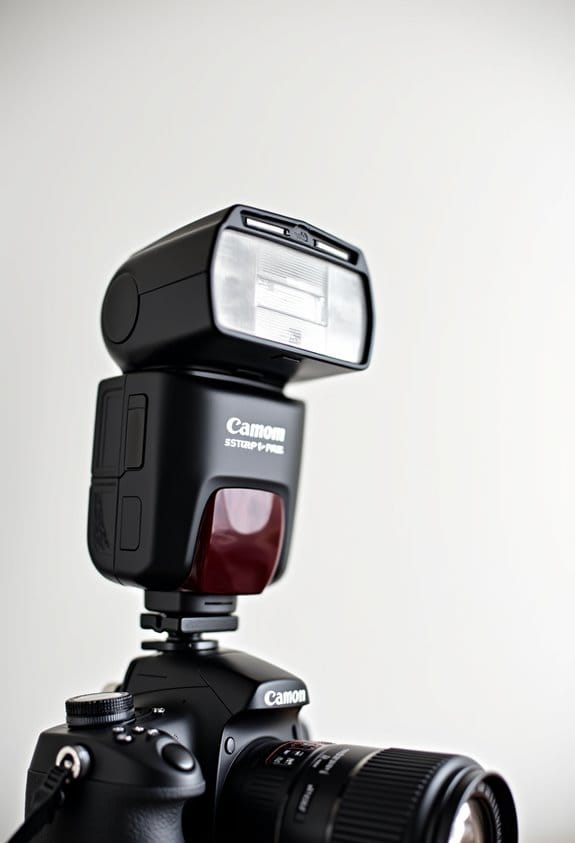
To further enhance your shots when natural light isn’t enough, consider using a portable flash to bring out vivid details and accurate colors in your food.
Enhancing Food Styling With Effective Lighting
Hey there! Let me share a little secret about effective food styling: lighting can make all the difference! If you have a north-facing window at home, you’re in luck! This type of natural light is soft and diffused, which helps us avoid those harsh shadows that can hide the beautiful colors and textures of our food.
When you set up your food close to the window, you’re really getting the best out of that natural light. It helps bring out all those delicious highlights that make your dish look even more appetizing. A trick I love is using white curtains to soften and diffuse the light even further. You can also utilize bounce cards—just think of them as reflectors that redirect sunlight to fill in shadows, making everything look a bit more flattering!
Don’t be afraid to experiment with angles, too. Moving around and shooting from different positions can create interesting shadows that add depth and dimension to your photos. Oh, and try to plan your shoots during the golden hours—just after sunrise or before sunset. The warm glow during these times can really enrich the colors in your food presentation, giving it that extra pop.
With those tips in mind, you’ll be well on your way to capturing some truly mouthwatering shots! A mirrorless camera with a flip screen can help you easily compose those perfect angles when shooting near windows. Now let’s talk about styling techniques that can complement that amazing lighting.
Recommended Products

Features: 3 Color(White, black and silver surface) light reflector, Great to fill in background. And Control the incoming light when taking photos,Light reflect, Diffuse, Block or soften light, Especially reduce shadows or emphasis on contours. Fit to different needs of reflector photography.

At Pino Studio, our mission is to bring out the best in every photo through the Pino Studio Background Sheet for Photography. We relentlessly develop and deliver premium-quality tools that make every shoot smoother and more rewarding. Crafted from wrinkle-resistant, durable fabric, the Pino Studio Background Sheet for Photography turns each session into a simpler, more enjoyable experience—so you can focus on capturing stunning images.
3 Color in One Light Reflector: White, black and silver surface, both front and back can be used, Great to fill in, reflect, diffuse, block or soften light, especially reduce shadows or emphasis on contours. Fit to Different Needs of reflector Photography
Creating Mouthwatering Imagery With Simple Tricks
Creating mouthwatering imagery is all about how we use light and angles to bring food to life in our photos. A great first step is to position your dish near a north-facing window. This type of light provides a soft, natural glow that really enhances the colors and textures of your food. If the sunlight feels too harsh, just hang a white curtain in front to gently diffuse it.
You can also play around with reflectors to brighten up any dark spots. Using simple items like white foam boards can help reflect light and add dimension to your shots, making your food look even more delicious. I love shooting during the golden hours—right after sunrise or just before sunset—when the light is warm and cozy. Remember to switch up your angles while capturing your food; it keeps the focus on the dish while adding some interesting elements to the scene. Using a camera with precise autofocus zones ensures that your food is always sharply in focus, highlighting every delicious detail.
Frequently Asked Questions
How to Get Good Lighting for Food Photography?
“Where there’s light, there’s life,” and for food photography, we’ve found that natural light creates stunning images. It gives soft shadows and color balance, enhancing our dishes beautifully. Experimenting with different times can lead to magic.
How to Shoot Through a Window Without Reflection?
To shoot through a window without reflections, we should position ourselves at an angle, focus on light diffusion, and use techniques for reflection reduction, like lens hoods and polarizing filters, ensuring our images come out clear.
What Is the 20 60 20 Rule in Photography?
We understand rules can feel limiting, but the 20 60 20 rule in photography guides our composition by balancing exposure settings, light diffusion, and techniques, ensuring our subject captivates while providing context and depth in each shot.
What Tricks Do Food Photographers Use?
Food photographers use props arrangement for visual interest, color contrast to highlight dishes, and angle variation to capture the most appealing perspectives. These tricks help create stunning images that draw viewers in and celebrate the food.