As an Amazon Associate, we earn from qualifying purchases. Some links on this site are affiliate links at no extra cost to you. Our recommendations are based on thorough research and editorial judgment.

Reflectors Explained: How to Use a 5-in-1 for Better Light
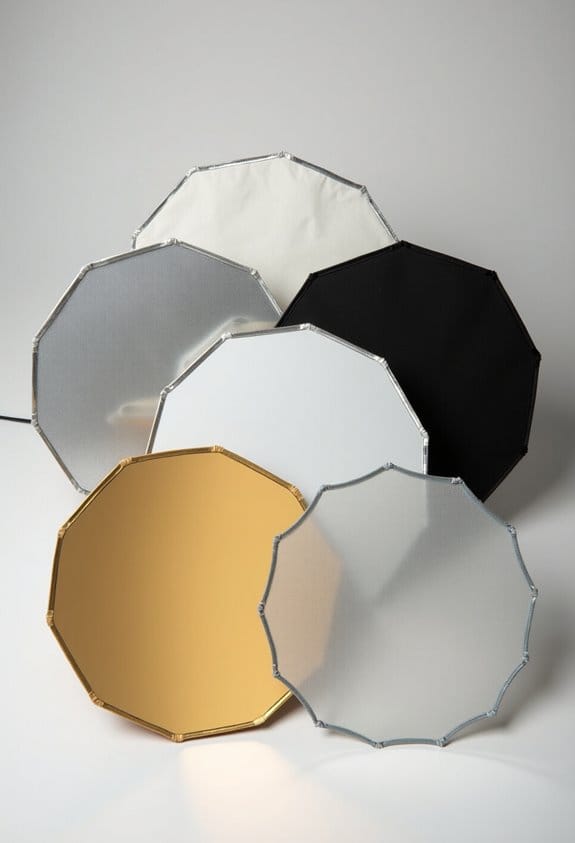
Using a 5-in-1 reflector can improve our photography by changing how light interacts with our subjects. The five surfaces—white, silver, gold, black, and diffusion—help us create various lighting effects. For example, the white side softens shadows, while the silver side brightens and intensifies light. We can practice different arrangements to enhance portraits and food photos. Experimenting with these surfaces is essential, as it sharpens our skills in utilizing light effectively. We can explore more tips and techniques.
Key Takeaways
- Utilize the white surface to soften harsh sunlight and create a diffused light effect for portraits and outdoor photography.
- The silver side enhances brightness and intensity, making it ideal for low-light conditions or dramatic scene lighting.
- For deep shadows and added drama, the black side absorbs light and accentuates features, perfect for artistic portraiture.
- Use the gold side to warm up skin tones and add a golden glow, especially effective during the golden hour.
- Experiment with the diffusion panel to soften shadows in various setups, enhancing image quality and texture in your photography.
Understanding the 5-in-1 Reflector
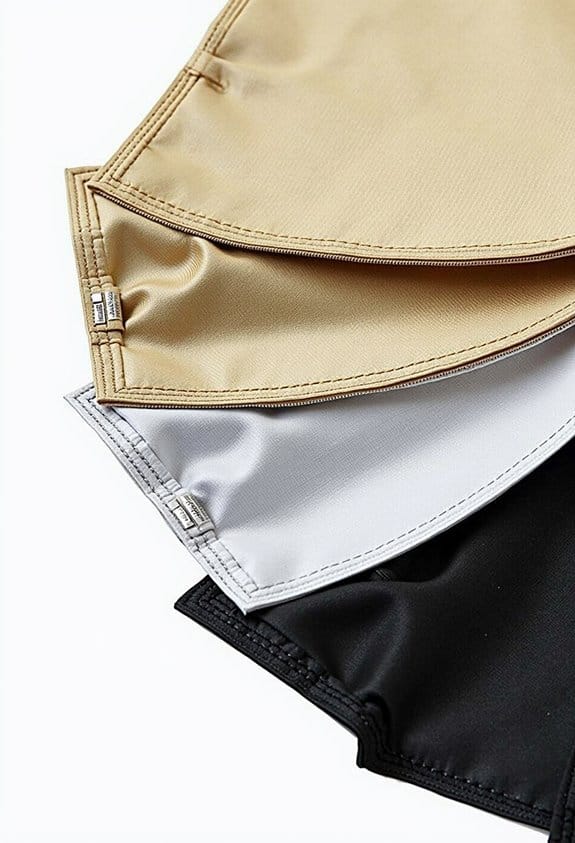
Hey there! So, let’s chat about the 5-in-1 reflector — it’s such a handy tool for any photographer wanting to play with light in their shots. Picture this: you’ve got five different surfaces at your disposal—white, silver, gold, black, and a diffusion panel. Each one is designed to help you create various light effects. For example, if you want to soften the harsh sunlight during a midday shoot, just flip to the white side for that lovely diffused glow.
On the other hand, if you’re looking for something a bit more dramatic, the silver side is your best friend. It throws back a cooler, more intense light that can really make your subject pop against a backdrop. And let’s not forget about the black side; it’s perfect for creating deep shadows in your photos, adding that extra layer of drama. Plus, the gold side gives a warm, sunny highlight, which can really enhance portraits during golden hour.
The diffusion panel is super useful too, especially if you’re trying to tone down bright light — it can reduce intensity by about two stops, making it easier to achieve that ideal balance. Best part? This reflector is compact and comes with a pouch, so you can easily toss it in your bag and take it wherever you go. The reflector’s collapsible design also makes setting up quick and storage effortless, perfect for photographers on the move. Now that you’ve got the basics down, let’s explore some creative ways to put this reflector into practice on your photo shoots!
Quality of Light and Reflector Effects

Hey there! So, have you ever thought about how a 5-in-1 reflector can really change the quality of light in your photos? It’s pretty fascinating! The quality of light refers to things like whether it feels soft or harsh, its color, intensity, and even its shape. When you use different types of reflectors, they can tweak these qualities in unique ways. For example, a white reflector gives off a soft, diffused light, which is great for gentle portrait shots. On the flip side, a silver reflector bounces back a much brighter, more intense light that can really help in low-light situations.
Adjusting the position of the reflector can make a big difference too. If you angle a silver reflector just right, you can create lovely highlights on someone’s cheekbones, while a white reflector positioned closer can soften the shadows on their face. It’s all about experimenting and seeing what works best for your scene. Understanding how reflectors impact light quality not only enriches your photography skills but also helps you create the perfect ambiance for any subject. Now, let’s talk about how to choose the right reflector for different environments! Using modifiers like softboxes and reflectors together can greatly enhance light diffusion quality to achieve the desired softness and control.
Practical Exercises With Reflectors
Hey there! Let’s chat about how using reflectors can really boost your photography skills. You know, reflectors are fantastic tools that help manage light and shadows in your shots. For instance, in our first exercise, if you’re shooting portraits, try placing a white reflector close to your light source—it seriously helps fill in those pesky shadows and can make a huge difference in the details of your subject’s face.
Now, if you want to take it a step further, in the second exercise, we can lift shadows from below the subject. Just position that same white reflector carefully—you don’t want to create any harsh highlights, just a nice, soft light. Experimenting with angles can help you see what works best.
Then, there’s the 5-in-1 reflector. This beauty is super handy because its bendable design lets you target those tricky shadowy spots while still keeping everything looking natural. Think about how it can help you when you’re trying to illuminate the details on someone’s face without washing them out—so useful!
Finally, let’s consider food photography for our last exercise. If you place your reflector parallel to backlighting, it can really highlight the textures and colors of your dish without losing that nice contrast. So whether you’re photographing people or tasty meals, reflectors can be your best friend when it comes to managing light. Ready to give these techniques a shot?
Using a reflector in combination with a suitable flash power output can further enhance lighting control and create more professional results in your photography.
Color Effects With Reflectors
Hey there! Have you ever thought about how color effects with reflectors can really shape the mood of your photos? Take a gold reflector, for example. It produces this lovely warm light that makes skin tones pop and highlights shine, especially when you’re shooting portraits. Imagine that golden glow making your subject look radiant!
Now, I get it—some people shy away from gold because it can be a bit overpowering. But if you place it behind your subject, it’s incredible how it adds just the right amount of warmth without being too overwhelming. On the flip side, using a black reflector can create a whole different vibe. It absorbs light, which helps to deepen shadows and define features without messing up the color balance.
The key is to find a good mix with the natural skin tones so that everything feels harmonious and true to life. Experimenting with these reflectors not only hones your skills but also sparks new ideas for your photography journey. Ready to explore different lighting setups next? Understanding bokeh and creative effects can help you use reflectors to creatively enhance your photos.
Importance of Practice and Versatility
Hey there! You know, practicing with a 5-in-1 reflector is super important if you want to level up your photography skills. When you use it regularly, you really start to see how different reflector surfaces—like the white and gold—can change the natural light around you. It’s pretty cool because it lets you quickly adapt to whatever lighting situation you’re in.
For instance, if you’re shooting a portrait and want that golden glow on your subject’s face, you can easily flip to the gold side of the reflector. Or if you’re working on a still life setup and need to soften the shadows, the diffusion side can work wonders. Each side of the reflector serves a unique purpose, and practicing with them lets you build confidence and create stunning lighting effects.
And you know what? The beauty of a 5-in-1 reflector is its versatility. You can take it to outdoor shoots, use it in your living room for family portraits, or even set it up for product photography. The more you practice, the more you’ll discover creative ways to manipulate light, which can drastically enhance the quality of your images. It really opens up a whole new world of possibilities!
Also, pairing your reflector practice with a camera that features in-body stabilization can help you capture clearer pictures during movement or shaky conditions, further improving your results.
Frequently Asked Questions
How to Use a 5 in 1 Reflector?
Using a 5-in-1 reflector’s various types, we can play with light like artists. Let’s position a silver side for that eye-catching sparkle or a diffusion panel to gently soften harsh sunlight in our photos.
What Is a 5 in 1 Reflector?
A 5-in-1 reflector combines several types of reflectors, each offering unique benefits. From softening light to enhancing warmth or blocking intensity, we can creatively shape our photography using this versatile tool in varying conditions.
How to Properly Use a Reflector?
Using a reflector’s reflective surfaces can feel intimidating, but once we comprehend light angles, we can position it to fill shadows, soften harsh light, and even create dramatic effects for stunning photography. Let’s experiment together!
What Is the 20 60 20 Rule in Photography?
The 20 60 20 rule in photography suggests a 20 60 ratio for composition, placing 20% of elements in the foreground, 60% in the middle, and 20% in the background, enhancing our image’s balance and depth.