As an Amazon Associate, we earn from qualifying purchases. Some links on this site are affiliate links at no extra cost to you. Our recommendations are based on thorough research and editorial judgment.

Lightroom Basics: The Tools That Make the Biggest Difference
In Lightroom, key tools like the Basic panel, Tone Curve, and Histogram greatly improve our photo editing process. The Basic panel allows us to quickly adjust exposure, contrast, and colors. The Tone Curve fine-tunes brightness and contrast based on our preferences. Additionally, the Histogram provides a visual guide to tonal values. By using Collections, we can effectively organize our images. As we explore these features, we can discover even more ways to enhance our workflow.
Key Takeaways
- The Basic panel allows essential adjustments like exposure, contrast, highlights, and shadows for improved photo quality.
- The Tone Curve panel provides precise control over brightness and contrast, enhancing tonal details in images.
- Local editing tools, such as the Adjustment Brush and Graduated Filter, enable targeted adjustments for specific areas of a photo.
- Develop Presets save time by applying consistent editing settings across multiple images, ensuring a cohesive look.
- The History panel tracks edits, allowing easy reversion to previous states and encourages creative experimentation without the risk of permanent changes.
Overview of Lightroom and Its Importance
If you’re starting to explore photo editing, you really need to check out Lightroom. This software is incredibly popular among photographers because it offers non-destructive editing, which means you can tweak your images without altering the original files. Imagine it like cooking from a recipe—you’re adjusting the flavors to your liking, but the main dish stays untouched.
Lightroom uses a Catalog system that works like a well-organized recipe book. Every edit you make is kept separate from the original photo, allowing you to experiment freely. In the Develop module, you’ll find a basic panel with easy tools for adjusting brightness and fixing colors. For instance, if a photo seems too dark, you can brighten it up without any fear of losing the original image.
You can also fine-tune your shots with features like lens corrections, which helps remove any distortions caused by your camera lens. Plus, Lightroom makes it super easy to sort and organize your photos so you can find them quickly. When it comes time to share your work, the Export function lets you save your images in different formats without losing quality, giving you full control over how your photos look. Using a camera cleaning kit regularly can also help ensure your photo edits start with clear, high-quality images.
The Develop Module: Key Features

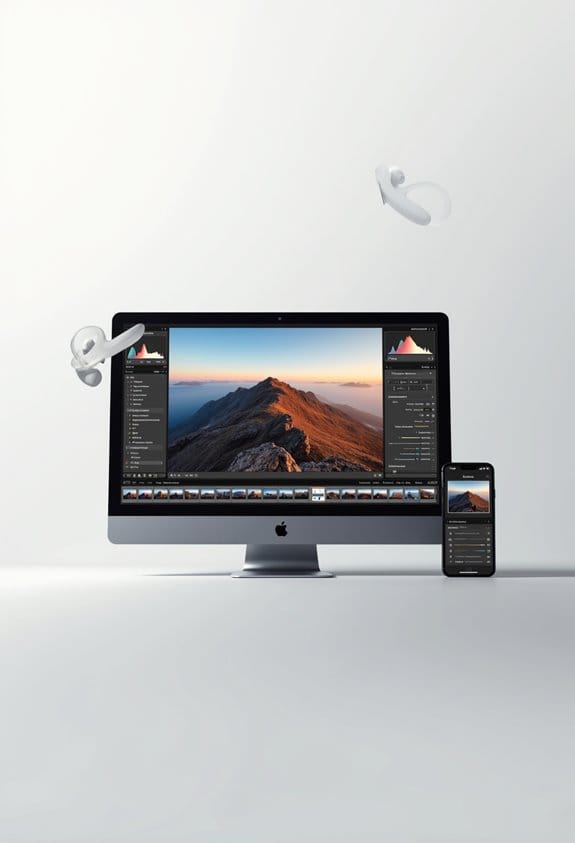
So, you’ve got the hang of how Lightroom helps us manage and edit our photos – great! Now, let’s talk about the Develop module and its key features. This is where the magic happens, as it includes some super handy panels like Basic, Tone Curve, and Lens Corrections. These tools allow you to tweak exposure and color without worrying about permanently altering your original photo.
For instance, if you want to enhance skin tones, just slide those Lightroom sliders until you achieve a natural look. It’s really that simple! And don’t overlook the Histogram panel; it’s like your roadmap for tonal values, helping you keep your edits on point. Need to ensure your adjustments match another image? The Reference View feature lets you compare your Active photo to a static Reference photo side by side.
Plus, you can get granular with local editing tools, like the Crop Overlay or targeted adjustment tools, which make it super easy to focus on specific areas of your image. As you work, the History panel keeps track of all your edits, making it effortless to go back if you change your mind.
With all these tools at your disposal, you’re set to really refine your edits and make your images pop. Next up, let’s explore some specific editing techniques to enhance your photos even further!
For photographers looking to capture sharper images, using a high-quality DSLR Focus Ring can greatly improve manual focus precision during shoots.
Essential Editing Tools and Functions
Hey there! You know, editing tools in Lightroom are super handy when it comes to making our photos really shine. For starters, the Basic panel is where you can easily adjust exposure, contrast, highlights, shadows, whites, and blacks. Think of it as your photo’s foundation—getting these elements right can transform an ordinary shot into something special. For example, if your photo looks a bit flat, increasing the contrast can add some real pop to the colors.
Then, there’s the Tone Curve panel, which is like having a fine-tuning machine at your fingertips. It lets you adjust the brightness and contrast more specifically by moving points on a curve. Picture this: if you want to brighten just the shadows without blowing out the highlights, the Tone Curve is your best friend.
If you want to fine-tune just part of a photo, the local editing tools really come into play. Tools like the Adjustment Brush and Graduated Filter let you make edits in specific areas. So, if the sky is too bright and you want to tone it down without affecting the rest of the image, you can simply paint over it with the Adjustment Brush.
Let’s not forget the Detail panel, which focuses on sharpening your image and reducing noise—especially helpful for those high ISO shots where grain can be an issue. Lastly, developing presets are a real time-saver! You can apply a consistent look across multiple photos with just one click. Doesn’t that make life easier?
With so many tools at your disposal, playing around with these features can really elevate your photography. Next, let’s explore how to creatively use presets for stylizing your entire collection. Medium format cameras, known for their greater dynamic range and superior color accuracy, create images that benefit tremendously from such detailed editing workflows.
Managing Image Organization With Collections
Hey there! If you’re into photography, you know how crucial it is to keep your images organized. Using Collections in Lightroom can make this task super easy and efficient. Think of it like making playlists for your favorite songs—you’re grouping your photos together for quick access while keeping the original file structure intact.
You can create different types of collections. For instance, regular collections let you manually group images, while Smart Collections automatically update based on specific criteria, like keywords or ratings. And if you’ve got a bunch of collections, you can group them into Collection Sets, which keeps everything neat and tidy. Adding photos to these collections is straightforward—you can drag and drop images or select them during import, which helps you sort things right from the get-go.
To protect your valuable DSLR images during travel or storage, consider using a hard case design that offers rugged protection and customizable interiors.
Creating and Using Develop Presets
Once we’ve organized our images into Collections, let’s chat about developing some cool Develop Presets in Lightroom. These presets are super handy because they let you save the editing settings from one image and easily apply them to other photos. For instance, if you have a particular look you love on one picture, you can use that same style on a whole series of images with just a click!
In Lightroom Classic, you’ve got the option to import presets all at once and keep them tidy in the Presets panel for easy access. The great thing about the Preset Amount slider is that it lets you adjust how strong the preset effect is. Say you want a vibrant color look but not too overwhelming—just slide it down a bit for a more subtle touch.
Keep in mind that any built-in presets you might find aren’t exportable, but you can always duplicate or tweak them to better suit your style. Plus, if you see any presets that look a bit faded out, that means they’re not compatible with your current photo, so you’ll know what you can actually use.
Now, with your Develop Presets set up, you can focus on fine-tuning your images further or exploring other features in Lightroom. Using presets efficiently can save you a lot of time, much like how dual battery chargers help power devices quickly and conveniently.
Tips for Effective Workflow in Lightroom
Creating an effective workflow in Lightroom can really make a difference in how smoothly you edit your photos. So, let’s chat about some simple strategies to help you streamline your editing process. For starters, organizing your images into Collections and Smart Collections in the Library module can make batch managing your photos a breeze. Think of it this way: if you have a camping trip collection, you can easily pull those photos up without digging through your entire library.
Another handy tool is the History panel. It keeps track of every edit you make, so if you decide you liked your photo better before that last tweak, you can easily go back. Also, don’t underestimate the power of presets! They can save you tons of time by giving you a consistent look across your images, especially useful if you’re editing a series of shots from the same event.
Customizing the order of your Develop panels can speed things up, too. You can keep your go-to tools at the top, which means less scrolling. Finally, using the Reference View lets you compare your edited images with the originals. This way, you can ensure your white balance is spot-on and make precise adjustments, especially when using the amount slider.
In addition, just as specialized tools like bubble levels help photographers achieve precise alignment, leveraging Lightroom’s built-in features can significantly improve your editing accuracy.
With these practical tips, you’ll find your editing sessions become faster and more enjoyable. Ready to dive into some specific editing techniques next?
Frequently Asked Questions
Do Professional Photographers Use LR Presets?
Yes, we professional photographers use Lightroom presets for style consistency and workflow efficiency. They offer time savings while allowing for creative expression through customization options, making them invaluable tools even for those seeking beginner insights.
What Are Lightroom Editing Basics?
They say a picture’s worth a thousand words, and with Lightroom, we can enhance our images through adjustments like exposure control, color correction, cropping, noise reduction, lens correction, and even adding vignette effects.
What Are the Seven Modules in Lightroom?
The seven modules in Lightroom are the Library Module for organizing photos, the Develop Module for editing, and the Map, Book, Slideshow, Print, and Web Modules for showcasing and sharing our creations in various formats.
What Are the Different Tools and Methods in Lightroom That You Might Use to Organize Your Photos?
When we think of sorting a suitcase after a trip, organizing our photos in Lightroom becomes just as essential. We can use photo culling, keyword tagging, collection sets, and smart collections for effective folder organization and metadata management.


