As an Amazon Associate, we earn from qualifying purchases. Some links on this site are affiliate links at no extra cost to you. Our recommendations are based on thorough research and editorial judgment.

Macro Photography Basics: (11), Working Distance, and Lighting
Macro photography opens the door to extraordinary details in small subjects we often miss. We need to understand working distance, which is the space between our lens and the subject, to avoid disturbing it. Proper lighting is essential, as natural light enhances colors and reveals textures, while artificial sources can help fill shadows. By mastering these basics, we can take stunning close-up images. If you’re excited about exploring further techniques, there’s much more to uncover.
Key Takeaways
- Macro photography captures subjects at life size (1:1 magnification), focusing on intricate details in nature and objects.
- A dedicated macro lens is essential to achieve true magnification and sharps details in your images.
- Working distance is crucial; maintain adequate space between the lens and subject to avoid disturbance during shooting.
- Optimal lighting enhances images; use natural light, ring or twin flashes, and diffused sources to minimize glare.
- Recommended settings include f/8 to f/16 aperture for depth of field and at least 1/1250s shutter speed for clarity.
What Is Macro Photography?

Macro photography is such a cool area of photography that really lets you explore the tiny worlds around us. When we talk about macro photography, we’re usually referring to capturing subjects at life size, which means they appear in the camera like they do in real life—not bigger or smaller. Have you ever looked at a flower and noticed the tiny details on its petals or the delicate wings of a butterfly? That’s exactly what macro photography aims to showcase!
To get those stunning close-up shots, it’s best to use a dedicated macro lens. These lenses are designed to help you focus on small subjects with incredible sharpness. For instance, if you’re photographing a ladybug, having the right lens will let you highlight its intricate spots and features without losing any detail. It’s also important to pay attention to the distance between your lens and the subject—keeping that distance greater can help reduce any disturbance to the little critter you’re capturing.
While natural light often does wonders for macro shots, don’t underestimate the power of artificial lighting, like ring flashes. They help manage shadows and make sure you get a clear view of even the tiniest details, like the tiny hairs on a bumblebee. So, whether you’re in a garden or your own backyard, with a bit of patience, you can capture the essence of these fascinating little subjects shining through your lens. Ready to grab your camera and explore? Using a macro lens with built-in lighting can further enhance detail visibility in your close-up shots.
Common Macro Photography Subjects
When it comes to capturing the beauty of the tiny world around us, macro photography really shines. One of the most beloved subjects is flowers, which offer a dazzling array of colors and shapes that are simply irresistible to photograph. Think about those delicate petals in the morning light—it’s like having a tiny masterpiece right in front of you!
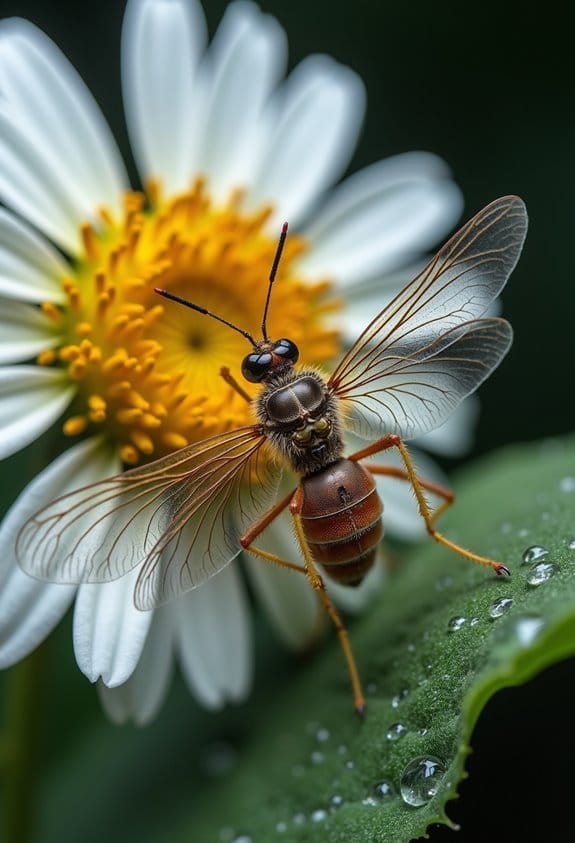
In addition to flowers, insects can be fascinating in macro shots. Imagine a close-up of a butterfly’s wings, showcasing intricate patterns that are often invisible to the naked eye. Just keep in mind that you’ll want to maintain a bit of distance to avoid spooking them; they can be a bit skittish!
Leaves are another worthy subject— the textures and veining can be absolutely captivating, especially when they’re dotted with sparkling dew drops. And don’t overlook everyday objects like coins or pieces of jewelry! They can surprise you with their fine details when you zoom in. The right lighting can really make these elements pop, enhancing your composition and bringing your shots to life. Experimenting with aperture priority mode allows you to control depth of field and bring out intricate details in your macro subjects.
Essential Macro Photography Gear

When it comes to macro photography, having the right gear makes all the difference. A good macro lens is a must-have since it lets you capture those beautiful 1:1 magnified details of small creatures or flowers. For example, when photographing a bee up close, you’ll be amazed at the intricate patterns on its wings that a standard lens just can’t capture.
Using a tripod is crucial, too. It helps keep your camera steady, especially when you’re dealing with longer focal lengths or slower shutter speeds. Imagine trying to shoot a delicate flower in the soft morning light—any little movement can blur your image. If you’re on a budget, close-up filters and extension tubes can be great alternatives, but they might not give you the same crisp quality as a dedicated macro lens.
Lighting is another key element. Continuous light sources, like LED panels, work wonders because you can easily adjust the brightness and angle to highlight your subject just right. And don’t forget about diffusers and reflectors! These tools help soften harsh shadows and create a more flattering light for that tiny critter or bloom you’re photographing. With the right setup, you can truly bring out the beauty of the small world around you. Ready to see what other techniques can elevate your macro shots?
Choosing a mirrorless camera with a high-resolution sensor can enhance the detail and clarity of your macro images significantly.
Macro Photography Settings
When it comes to macro photography, nailing the right settings can make all the difference. Start with your aperture; aim for f/8 to f/16. This range gives you a nice depth of field, letting you capture stunning details of tiny subjects like a flower petal or an insect’s wings without sacrificing sharpness.
Next up is shutter speed, and here’s a tip: use at least 1/1250s if you’re shooting handheld, especially if your subject is moving. This helps prevent any motion blur. For example, if you’re trying to photograph a busy bee buzzing around flowers, a faster shutter will freeze that action beautifully.
Also, consider switching to manual focus when you’re working with high magnification. Autofocus can struggle with these tiny details, and manual control allows you to pinpoint exactly where you want to focus. If you want to capture a series of shots quickly, try using continuous shooting mode. Just remember to keep an eye on your ISO settings to ensure proper exposure in varying light.
Using an external microphone when recording video during macro shoots can dramatically enhance audio quality by minimizing background noise and improving clarity.
With these tips in hand, you’ll be well on your way to capturing incredible macro shots! Now that you’ve got your settings sorted out, let’s talk about the best lighting techniques to make those details pop.
Macro Photography Lighting
Hey there! If you want to really make your macro photography pop, getting a handle on lighting techniques is key. Natural light is often your best friend, especially on cloudy days or during that magical golden hour when everything seems to glow softly. This kind of light brings out the details in your subject without being too harsh or creating those unflattering shadows.
Sometimes, though, the sun doesn’t cooperate, and that’s where artificial lighting comes in handy. Think about using a ring flash or twin flash—it surrounds your subject with light, which can be super helpful when you’re photographing tiny things like insects or flowers. Plus, if you opt for continuous lighting, like RGB panels, you can adjust your settings on the fly and see how the changes affect your shot right away.
And one little tip: try using diffused light to minimize glare and create a more balanced exposure. When it comes to your camera settings, choosing a smaller aperture, like f/8 to f/16, can be really beneficial. This way, you’ll get a greater depth of field, making sure the whole subject is in focus—perfect for those intricate details in macro shots. Once you feel comfortable with lighting, we can explore how to play with composition to really elevate your images!
If the available light isn’t sufficient, consider introducing an external flash to enhance your subject’s illumination and reduce motion blur.
Tips for Macro Photography Beginners
Getting started with macro photography can seem a bit daunting, but trust me, it’s a lot of fun once you get the hang of it! To capture those stunning close-ups, you’ll want a camera that has macro lenses. These lenses let you get a true 1:1 magnification, which means you can see incredible details—like the intricate patterns on a butterfly’s wings or the tiny hairs on a flower petal.
Now, a solid tip for you is to always use a tripod. This little gem will help keep your camera steady and reduce any shake, especially when you’re shooting in low light and need a longer exposure. For instance, if you’re out in a garden during sunset, a tripod will let you capture an amazing shot of a bee on a flower without blur.
When it comes to settings, playing around with your aperture between f/8 and f/16 can really enhance your depth of field and make details pop. And if you can, try to shoot in natural light—golden hour is perfect for that soft, almost magical quality it brings to your photos.
The last thing to keep in mind is that patience is your best friend. Macro photography takes practice, and sometimes you’ll take a few shots before you get that perfect one. So, grab your camera, get out there, and enjoy the process! It’s incredibly rewarding to watch your skills grow over time, and you’ll be amazed by the beauty you can capture.
Choosing a camera with a larger APS-C sensor can also enhance your macro shots by capturing more detail and improving image clarity.
Frequently Asked Questions
What Is Working Distance in Macro Photography?
Wondrously, working distance in macro photography refers to the space between the lens and our subject. It impacts focal length, depth control, background blur, and is essential for capturing stable, stunning details without startling our subjects.
What Is the 20 60 20 Rule in Photography?
The 20 60 20 rule helps us balance our compositions. By adjusting focal length, lens types, and aperture settings, we can enhance our subject matter, manage background blur, and control depth, leading to striking images.
What Are the Basic Rules for Macro Photography?
For great macro photography, we should focus on lens selection, aperture settings, and subject choice. Utilizing a tripod guarantees image stabilization, while prioritizing angle preference and depth control enhances background blur and overall composition.
What Kind of Lighting Is Needed for Macro Photography?
To capture nature’s tiny wonders, we need a dance of light—both natural and artificial. Mastering diffusing techniques, lighting angles, and reflectors helps us manage shadows and create stunning macro images with perfect color temperature and intensity.


